
Meet Mila
Mila is an invented character, not a real person. She is 27, about 178 cm, with champagne-blonde hair below the shoulders and a center part, grey-blue almond eyes, an oval heart-shaped face, full blonde eyebrows, and a small beauty mark below her right eye.
The goal was intelligent, calm, observant, and modern. We did not want a glossy influencer stereotype, because those often melt into the same smooth face with better lighting and less personality than a hotel lobby.
Her backstory is simple: Mila is a fashion editor from 2030 who styles her own looks and posts them. The distinctive parts matter because a generic pretty face is hard to verify across shots; freckles, brows, and a beauty mark give you, and the model, proof that it is still her.
Step 1 — the reference sheet
One portrait is not a character. A reference sheet is. We generated six angles: a base portrait, a 30° turn, a 90° profile, a mid-thigh shot, a full body shot, and a full body shot at 30°.
The core trick is simple: once a good image exists, feed that already-generated image back in as a reference. Then give the model a short instruction to keep the face and anatomy unchanged. This worked better than writing longer and longer prompts, which is how you end up sounding like a police sketch artist with a migraine.
We also stayed mostly inside one engine on purpose. That reduced identity drift and helped us learn where that engine breaks, instead of blaming five tools at once like a tired parent on a road trip.
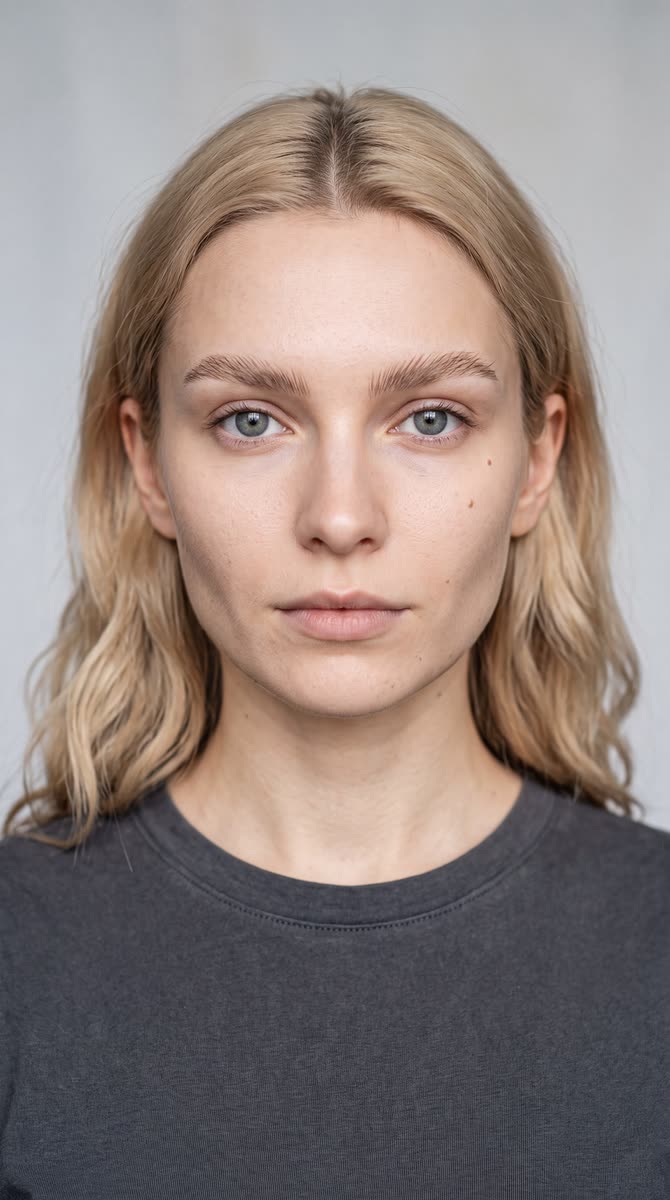
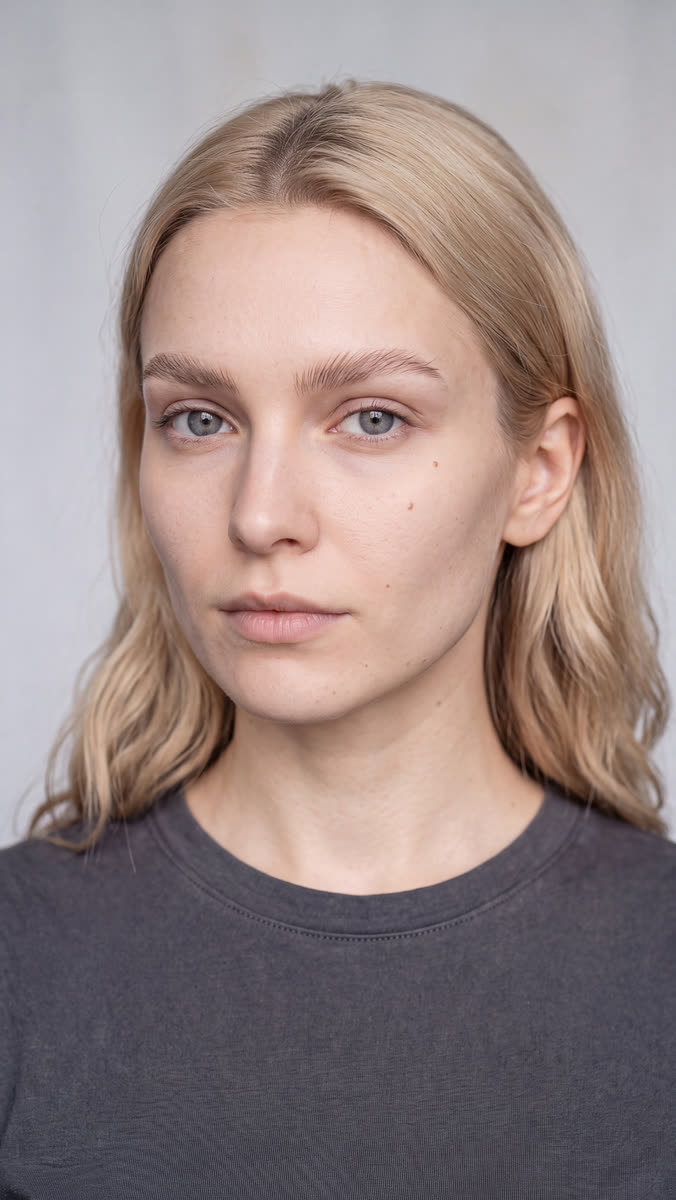
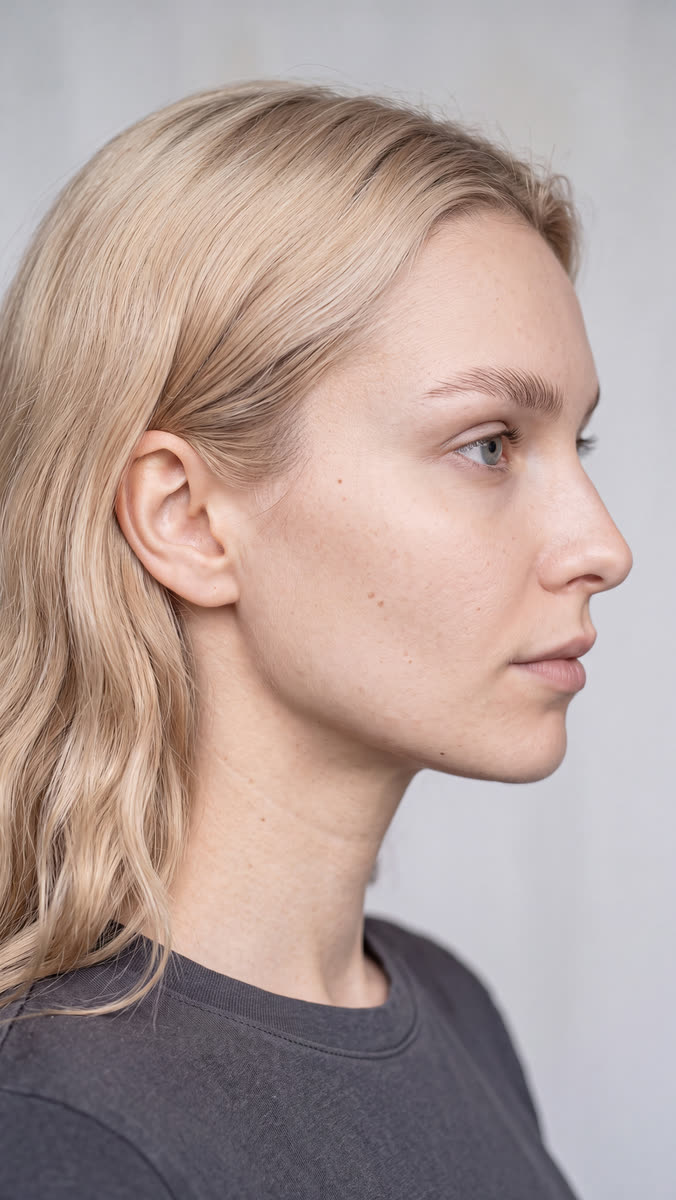
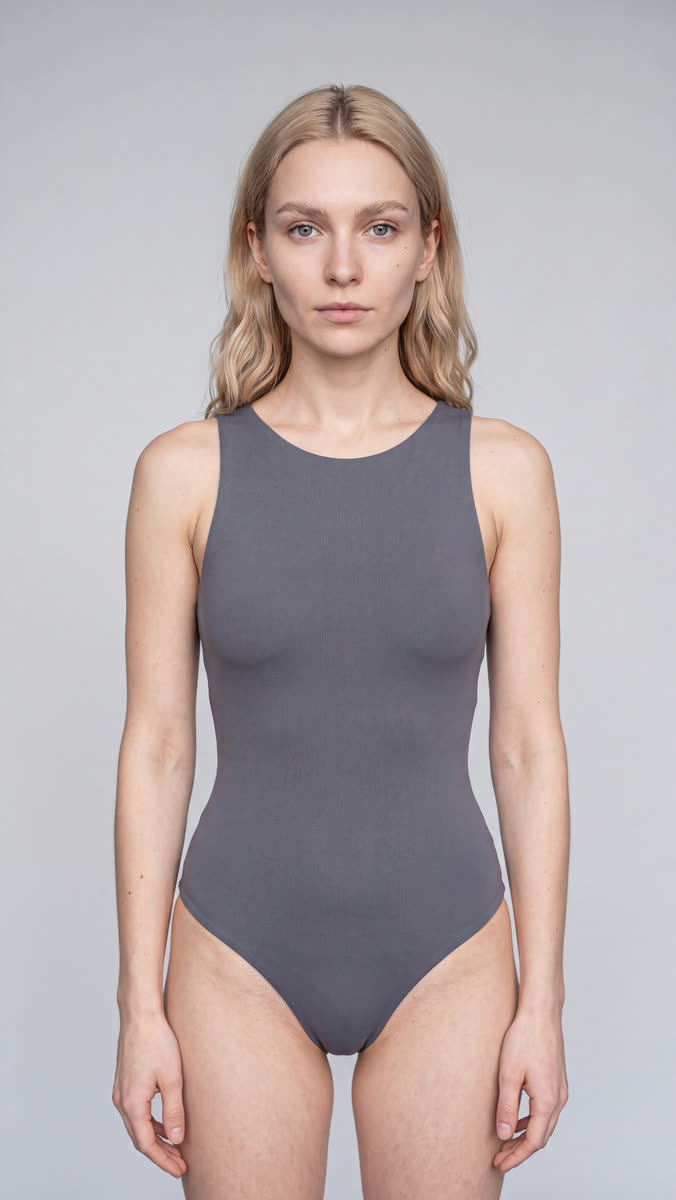
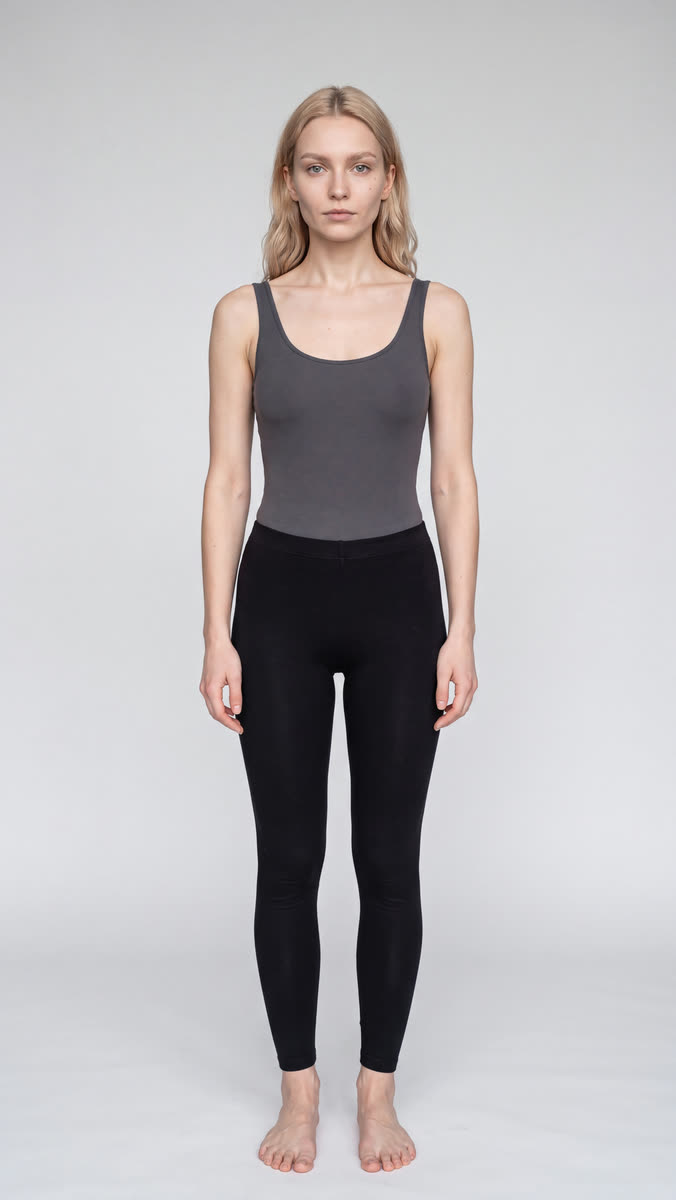
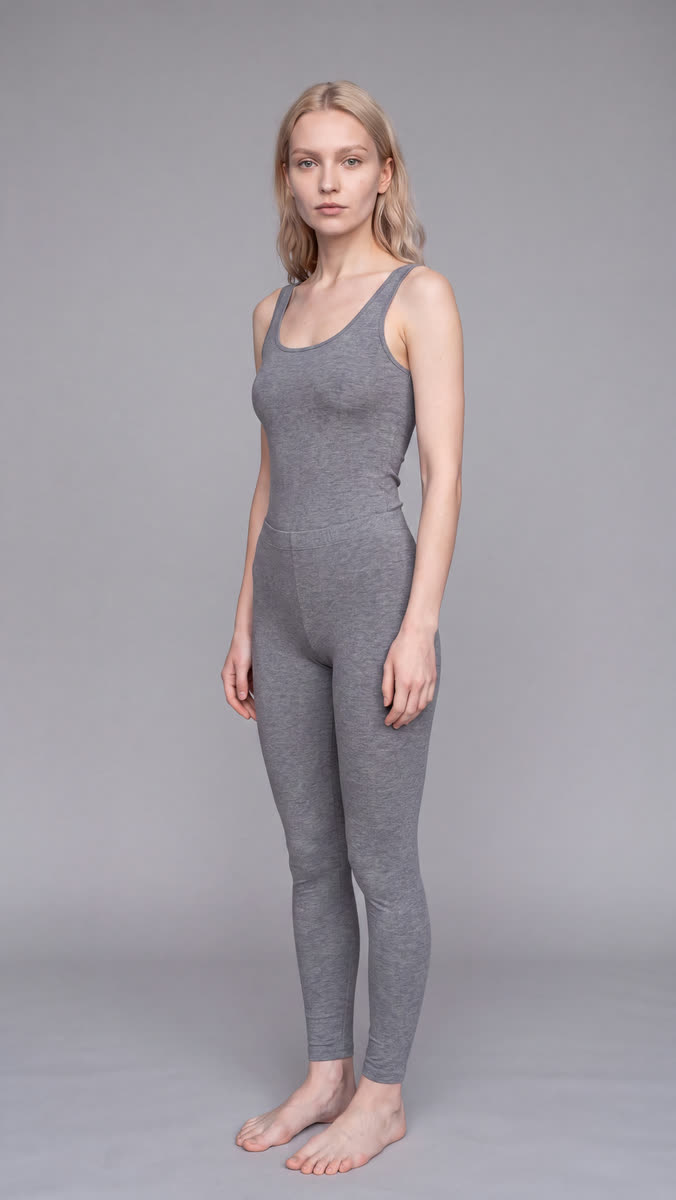
Mila's reference sheet — every later shot is generated from these.
The five prompts behind the sheet
The prompts are shown with each shot, and the notes explain why each one is there. The pattern to copy is the important part: repeat the same physical description every time, name the one thing that changes, and add approved images as references as you go.
Every prompt re-states the same face description and adds one new angle. The uploaded portrait does the heavy lifting; the words only tell it where to look.
Reveal the prompt
Use the uploaded portrait of Mila as the primary identity reference. Create a RAW photorealistic studio portrait of the same real-looking adult woman. Keep her exact face: fair skin with natural texture, oval heart-shaped face, defined cheekbones, soft refined jawline, large expressive grey-blue almond eyes, straight narrow nose, natural medium lips, distinctive full blonde eyebrows with a soft lifted arch, and a small beauty mark below her right eye. Champagne-blonde hair below the shoulders, centre part, soft waves. Head-and-shoulders view, face turned 30 degrees to her left, eyes looking into the camera, head upright and level. Calm, intelligent, slightly reserved expression, closed lips. Minimal makeup, graphite-grey crew-neck top, no jewellery. Light-grey seamless studio background, soft frontal light, 85mm lens look, realistic colour, unretouched human photo. No illustration, CGI, doll face, glamour filter, text or watermark.
A strict side profile is the hardest angle to keep on-model — spelling out the eyebrows and the beauty mark is what holds it together.
Reveal the prompt
Use the uploaded portrait of Mila as the primary identity reference. Create a RAW photorealistic studio image of the same real-looking adult woman. She is tall and slender, with fair skin, natural texture, visible pores, an oval heart-shaped face, defined cheekbones, a soft refined jawline, large expressive grey-blue almond eyes, a straight narrow nose, natural medium lips, and a small beauty mark below her right eye. Her eyebrows are distinctive: light blonde, full, textured, elegant, with a soft lifted arch. Her hair is champagne blonde, below the shoulders, centre part, soft waves. Show a strict 90-degree right-facing side profile, head level, calm neutral expression, closed lips, hair tucked behind the visible ear. Graphite-grey crew-neck top, no jewellery. Light-grey seamless studio background, soft diffused light, true human photo. No cartoon, CGI, doll face, beauty filter, text or watermark.
"Do not redesign, reinterpret, beautify or replace her face" reads like nagging, and it is exactly what stops the drift.
Reveal the prompt
Use the uploaded portrait as the only identity reference. Create a RAW photorealistic studio photo of the exact same woman, framed from head to mid-thigh. Do not redesign, reinterpret, beautify or replace her face. Preserve her identity exactly: same facial geometry, proportions, eyes, eyebrows, nose, lips, jawline, skin tone, hairline, hairstyle and beauty mark. She is a clearly adult woman, tall and slim, with a defined waist and balanced feminine curves. She faces the camera in a relaxed neutral pose, arms slightly away from her torso. She wears a fitted graphite-grey bodysuit. Light-grey seamless background, soft even light, 50mm lens, realistic skin texture, true human photography. Keep the face sharp, detailed and clearly recognizable. No new face, face variation, cartoon, CGI, doll-like skin, distorted anatomy, text or watermark.
Now TWO references go in — the portrait plus the approved mid-thigh shot. The more approved angles you feed back, the more stable she gets.
Reveal the prompt
Use the uploaded portrait and approved mid-thigh image as identity references. Create a RAW photorealistic full-body studio photo of the exact same woman. Do not redesign or replace her face. Preserve her identity exactly: same facial geometry, proportions, eyes, eyebrows, nose, lips, jawline, skin tone, hairline, hairstyle and beauty mark. She is a clearly adult woman, about 178 cm tall, with a slim elegant figure, defined waist, softly rounded hips, balanced feminine curves and long legs, suitable for dress fittings. She stands front-facing in a relaxed neutral pose, arms naturally at her sides, full body visible from head to bare feet. Fitted graphite-grey bodysuit, matte black leggings. Light-grey studio background, soft even light, 50mm lens, true human photo. No new face, face variation, cartoon, CGI, doll-like skin, distorted anatomy, cropped feet, text or watermark.
By this point the prompt can be short. She already exists; you are just booking her for another shot.
Reveal the prompt
Using the uploaded portrait as the face reference, create a photorealistic full-body studio photo of the exact same woman. Tall, slim figure with a defined waist and natural feminine curves. Body turned 30 degrees, head toward the camera, relaxed pose, full body and feet visible. Preserve her face and hair exactly. Simple fitted grey outfit, soft studio light, plain grey background, no cartoon, CGI or distorted anatomy.
The five prompts that turned one portrait into a full reference sheet.
Step 2 — build the wardrobe
After we picked a look, we asked the image model to pull out each garment and accessory as its own clean product shot: dress, handbag, shoes, sunglasses, earrings, and bracelet.
That extra step is worth it. Once an item exists as its own reference image, you can put it back into any scene and it has a much better chance of staying the same item. That is how a real lookbook is built, minus the clothing rack that always blocks the door.
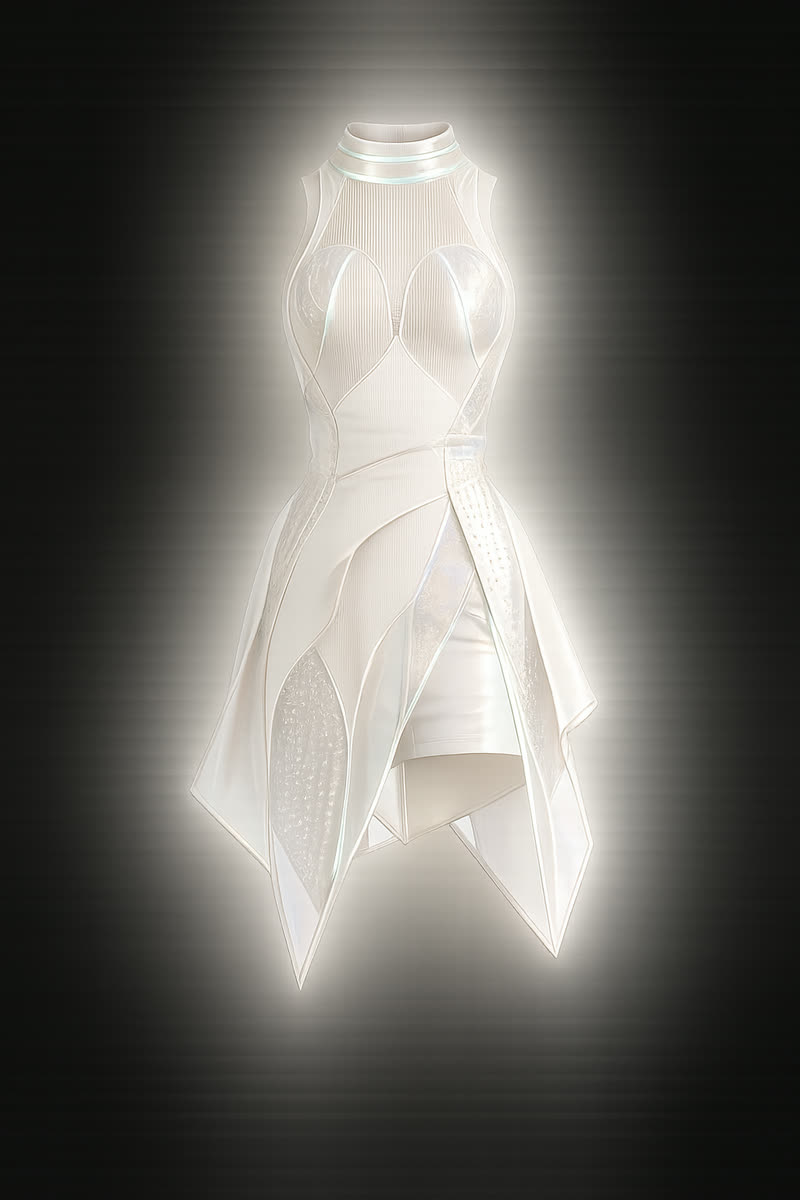
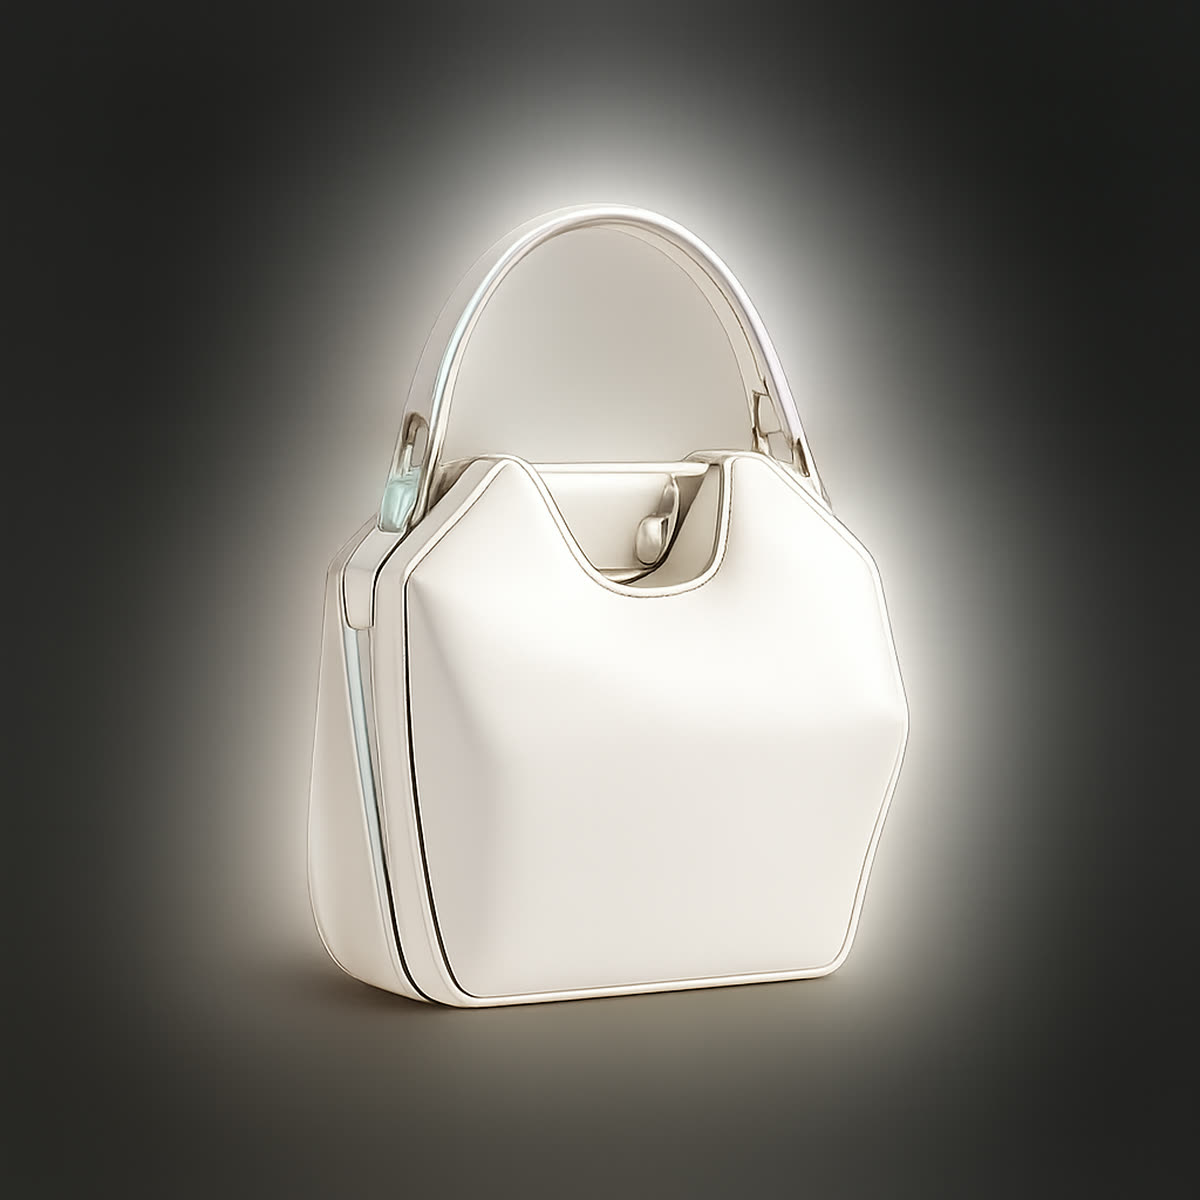
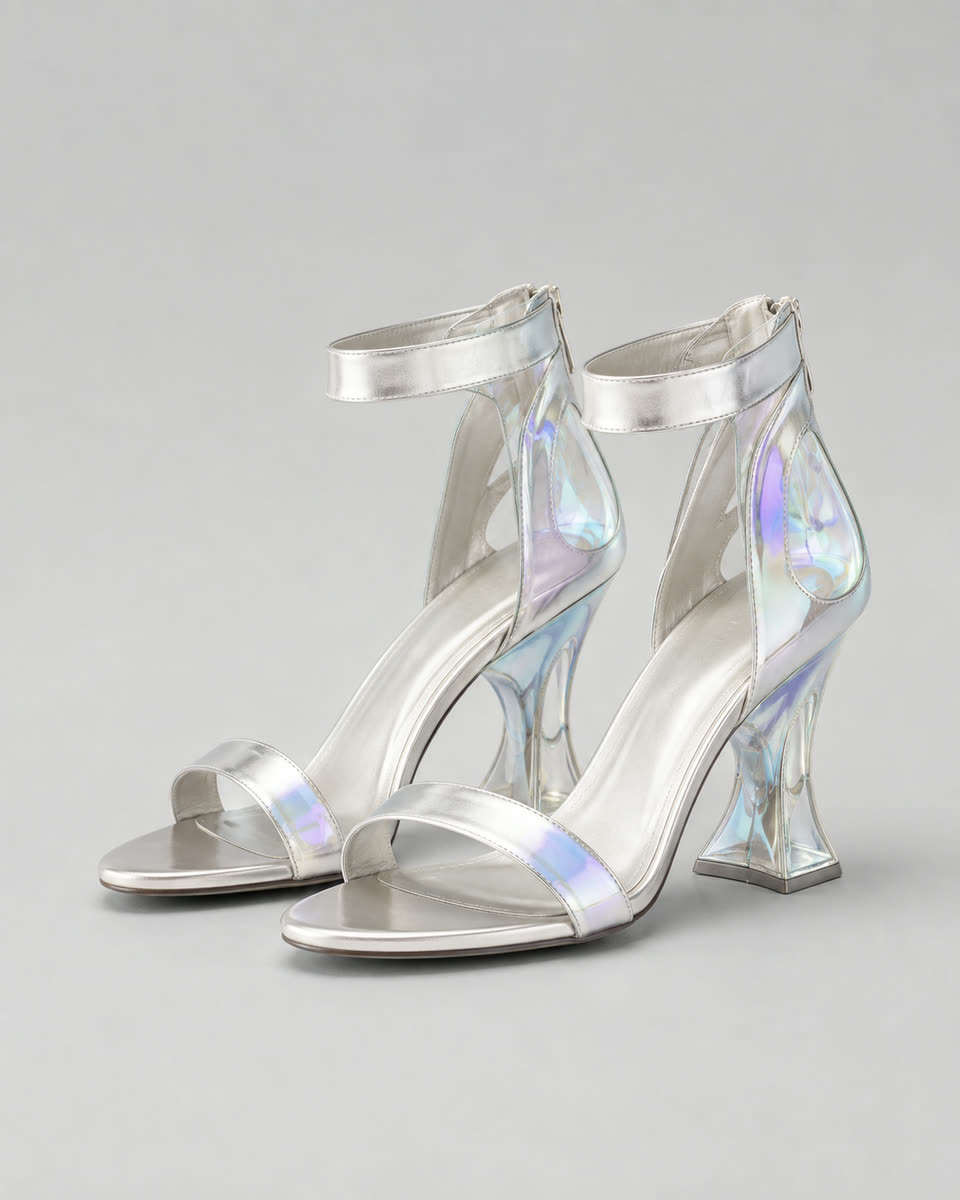
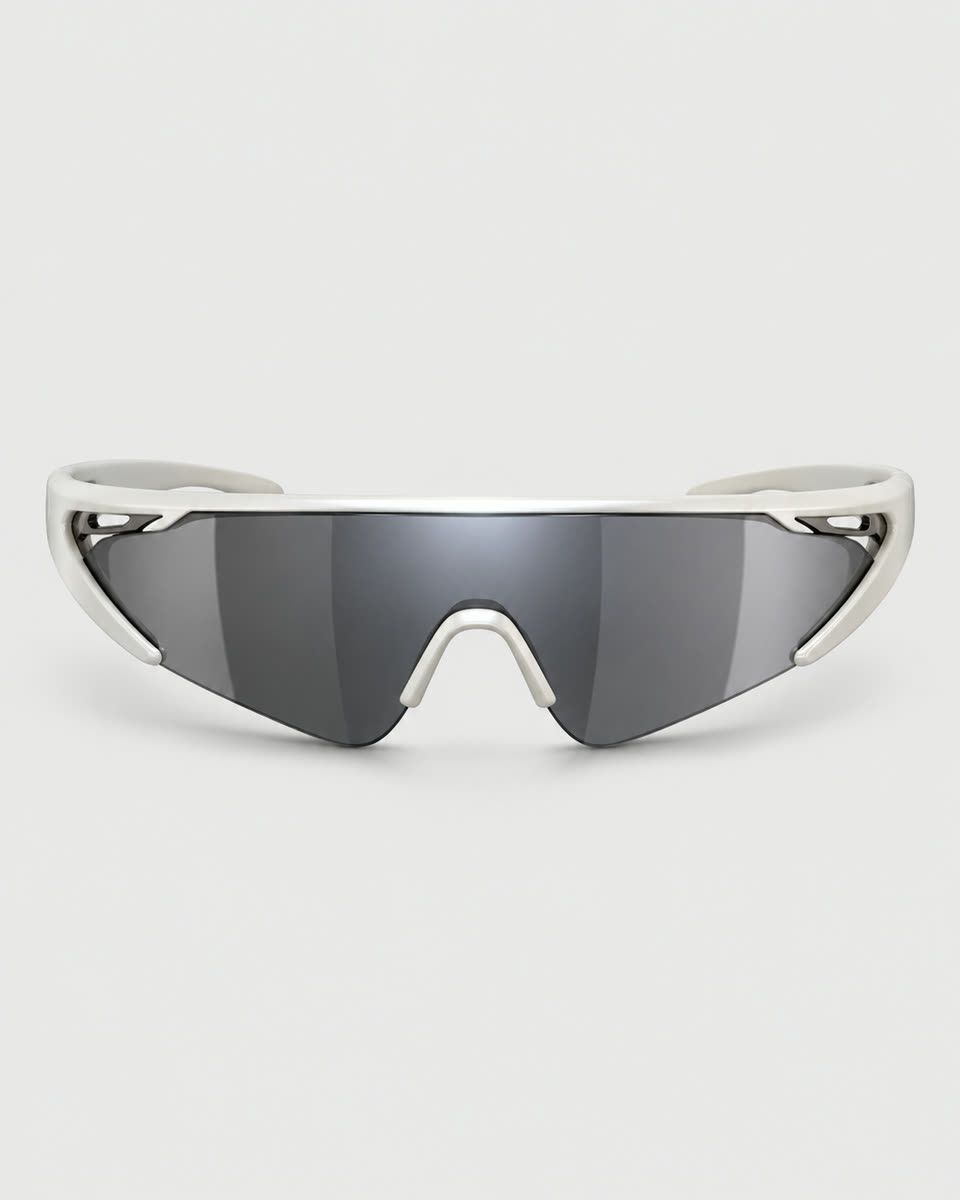
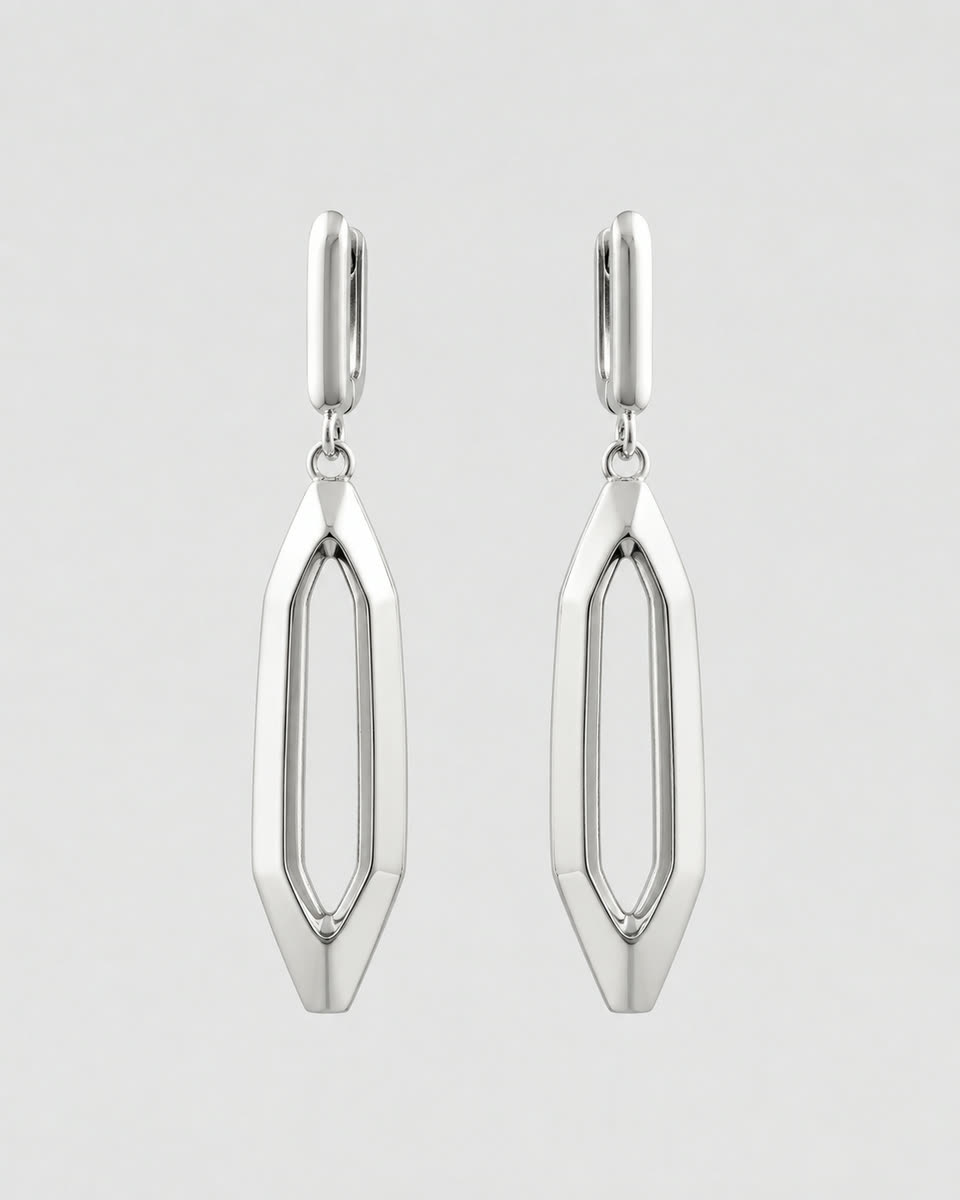
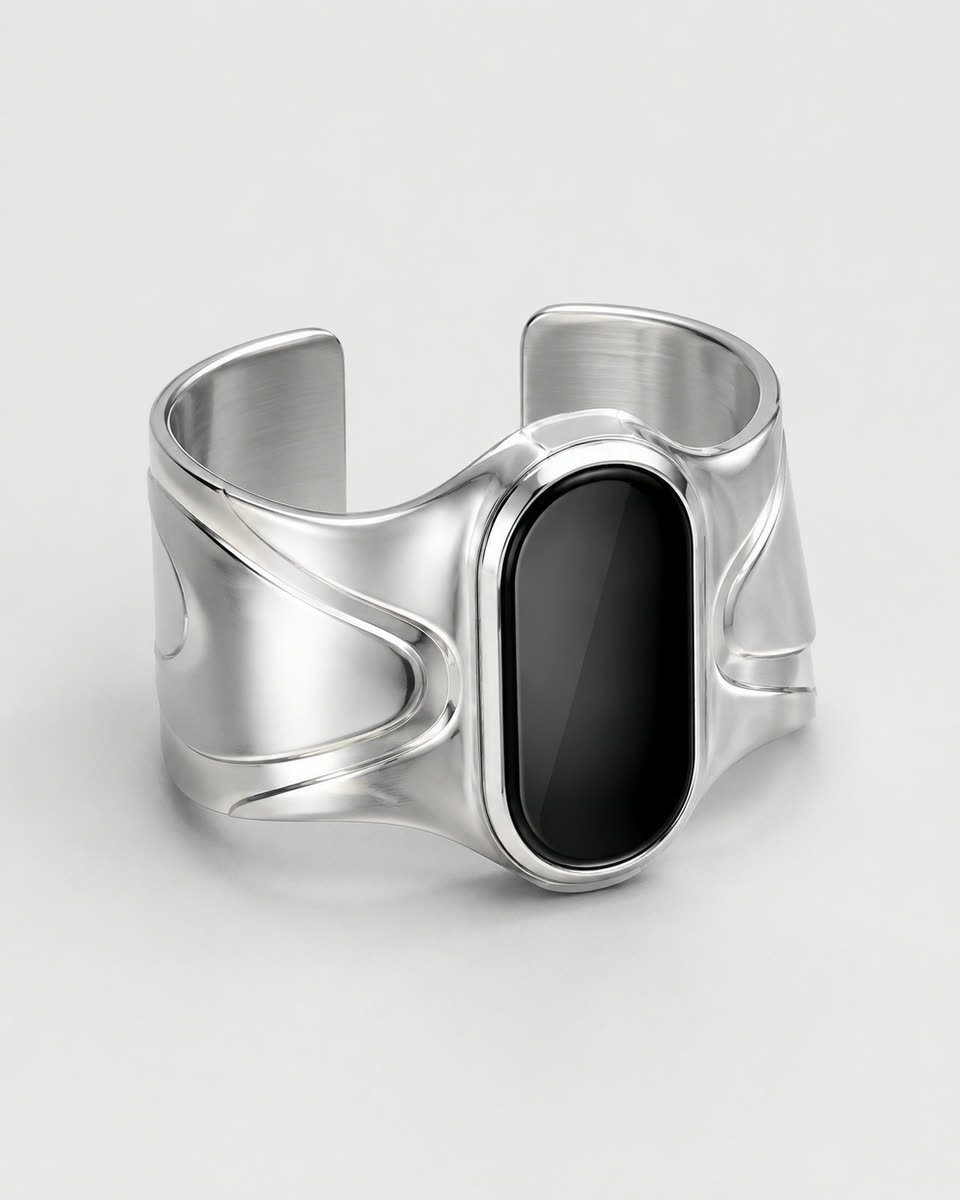
Each item pulled out as its own product shot, so it can be re-used consistently.
Step 3 — make her talk
For the talking shot, the stack was honest and a little patched together. We generated a talking clip from a still, made the voice in ElevenLabs, and did the lip sync in Sync.so.
Voice and lip sync are outside Vynzo today. Kling 2.6 can do lip sync natively inside Vynzo, and GPT Image 2 is coming to Vynzo soon.
The practical tip matters more than the tool list: start each lip-sync take from a different source clip with different gestures and expression. Reusing one source clip makes the result feel robotic, like Mila has been trapped in a pleasant customer-service loop.
The talking segment — expression and gesture matter more than the words.
Reveal the prompt
Use the uploaded reference image as the exact identity of the character. Preserve her face, hairstyle, skin tone, proportions, clothing and accessories. Do not redesign or stylize her. Medium close-up, eye-level camera. She looks into the lens and speaks naturally: "[DIALOGUE]". Precise lip sync. Expressions follow the speech: subtle eyebrow movement, realistic blinking, small smiles, brief pauses and natural breathing. She uses restrained hand gestures, small head nods and slight posture shifts. Movements are smooth, relaxed and conversational, never theatrical or repetitive. Keep hands anatomically correct. Negative prompt: identity drift, facial warping, frozen expressions, excessive blinking, random gestures, distorted hands, lip-sync errors, flicker, camera shake, cuts or background changes.
Step 4 — the at-home segment
The at-home segment is simple on paper: Mila presents one product per clip. The workflow repeats each time: generate the still from the reference set, animate it, re-roll it, and keep the best take.
Each clip carried the same instruction to preserve identity and keep movement natural and subtle. The notes under each clip are where the real lessons live, because the first version is often where the model politely shows you a new problem.
A full turn is the honest test of a character: the model has to stay herself through 360°. This one landed — but note how much of the prompt is spent forbidding things rather than asking for them.
Reveal the prompt
Use the provided frame as a strict reference. Vertical 9:16, full-body, static camera. Keep the same woman, identity, face, body proportions, hairstyle, dress, bare feet, room, lighting and framing unchanged throughout. She starts already facing the camera, looking directly into the lens with a soft natural smile. From this exact starting pose, she gently holds the sides of the dress with both hands and makes one smooth natural full turn around herself at normal real-time speed, with small realistic steps. The movement should feel elegant and physically natural, with subtle fabric motion and slight hair movement. After the turn, she finishes facing the camera again. No slow motion, no strange grimaces, no exaggerated expressions, no face distortion, no identity drift, no hand glitches, no extra fingers, no foot deformation, no added heels or footwear, no camera movement, no flicker
Our favourite failure: the model kept passing the bag straight THROUGH her own arm, like a ghost. Many retries later we used it only in part. Physical contact between a hand and an object is still where these models wobble.
Reveal the prompt
A woman naturally presents a light-colored leather handbag in a minimalist room. She gently turns her upper body slightly toward the camera, carefully lifts the bag by its handle, and brings it a little closer to the lens to showcase its shape, leather texture, stitching, and hardware. She then subtly adjusts her grip and slowly rotates the handbag to reveal its side profile. Her expression remains calm and confident, with a soft, natural smile. Her hair and clothing move slightly with her body. The camera performs a slow, smooth push-in while keeping the handbag as the main focal point. Realistic premium fashion commercial, soft natural daylight, elegant and controlled movement, high detail, stable composition, smooth natural motion
Asking for an invisible phone plus deliberate handheld shake is what makes it read as a real selfie. The sunglasses temples kept vanishing on the turn — only fixable by re-rolling and naming that exact detail.
Reveal the prompt
Create a photorealistic vertical 9:16 front-camera selfie video from the reference image. Preserve her identity, hair, sunglasses, mint athletic outfit, room, lighting, and framing. The phone is in her hand but never visible, so the camera should have subtle natural handheld motion throughout: tiny shakes, micro-sways, and slight distance shifts. She looks at the screen, slowly turns her head to one side and freezes, holding still for a moment to show the sunglasses. Then she slowly turns her head to the other side and freezes again. After that, she gently brings the camera closer to her face for a close-up of the sunglasses and holds it there briefly. Add natural blinking, breathing, tiny facial movements, and slight hair motion. No speaking, cuts, sudden motion, warped features, or background changes.
First-frame / last-frame. The rule nobody tells you: the camera position must match in BOTH frames, or objects drift across the cut.
Reveal the prompt
Use the first frame as the starting pose and the last frame as the ending pose. In the same bright minimalist room, the woman sits on the sofa and smoothly transitions from reaching toward the open shoebox on the floor to lifting one iridescent heel out of the box and examining it in her hands. At the start, both shoes are clearly inside the shoebox among the tissue paper. During the action, she leans forward, reaches into the box, takes only one shoe by the ankle strap, lifts it up, and supports it with her other hand while looking at it with soft curiosity and a subtle pleased smile. By the end, one shoe is in her hands and the second shoe remains inside the box. Maintain consistent appearance, outfit, room layout, shoebox position, and shoe design. Soft daylight, static camera, realistic motion
Second attempt. On the first, the hand calmly rotated a full 360 degrees, which a wrist cannot do.
Reveal the prompt
A cinematic product showcase of a futuristic silver iridescent high-heel sandal being elegantly held in one hand inside a bright, minimalist living room. The camera performs a slow, smooth push-in combined with a subtle left-to-right arc, creating gentle parallax between the shoe and the softly blurred background. The hand naturally rotates the shoe a few degrees to reveal the shimmering holographic panels, metallic finish, sculptural transparent heel, and ankle strap. Soft daylight from the window creates realistic reflections and rainbow highlights that glide across the surface as the camera moves. The background remains calm and out of focus, emphasizing the product. Premium luxury fashion commercial aesthetic, ultra-realistic materials, clean composition, shallow depth of field, stabilized camera, natural motion only, no abrupt movements, no object deformation, no flickering, no warping, no extra fingers or artifacts.
The at-home segment — one product per clip.
The first-frame / last-frame trick
For anything with a clear beginning and end, such as taking a shoe out of a box, give the model both the first frame and the last frame. It needs to know where the action starts and where it should land.
The rule people miss is camera position. The first and last frame must use the same camera position. If they do not, objects slide and morph because the model is trying to move the camera and the object at the same time, which is how shoes become haunted.
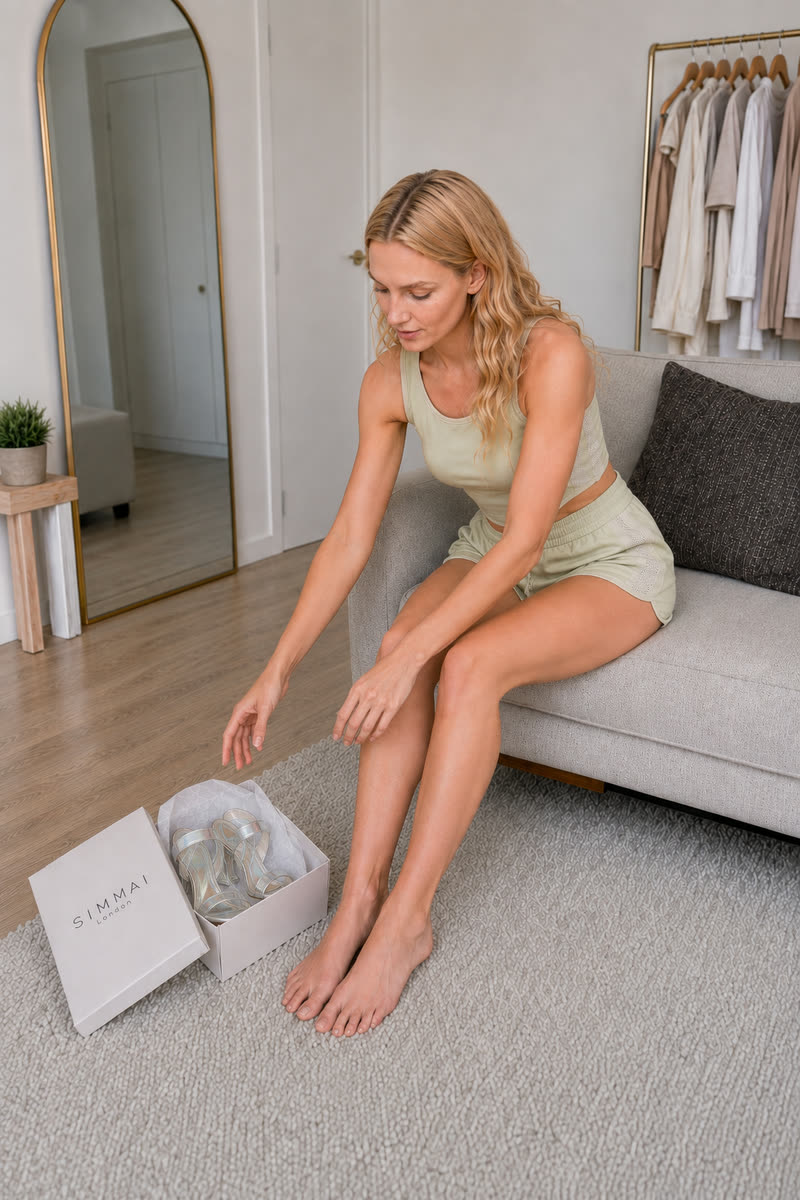
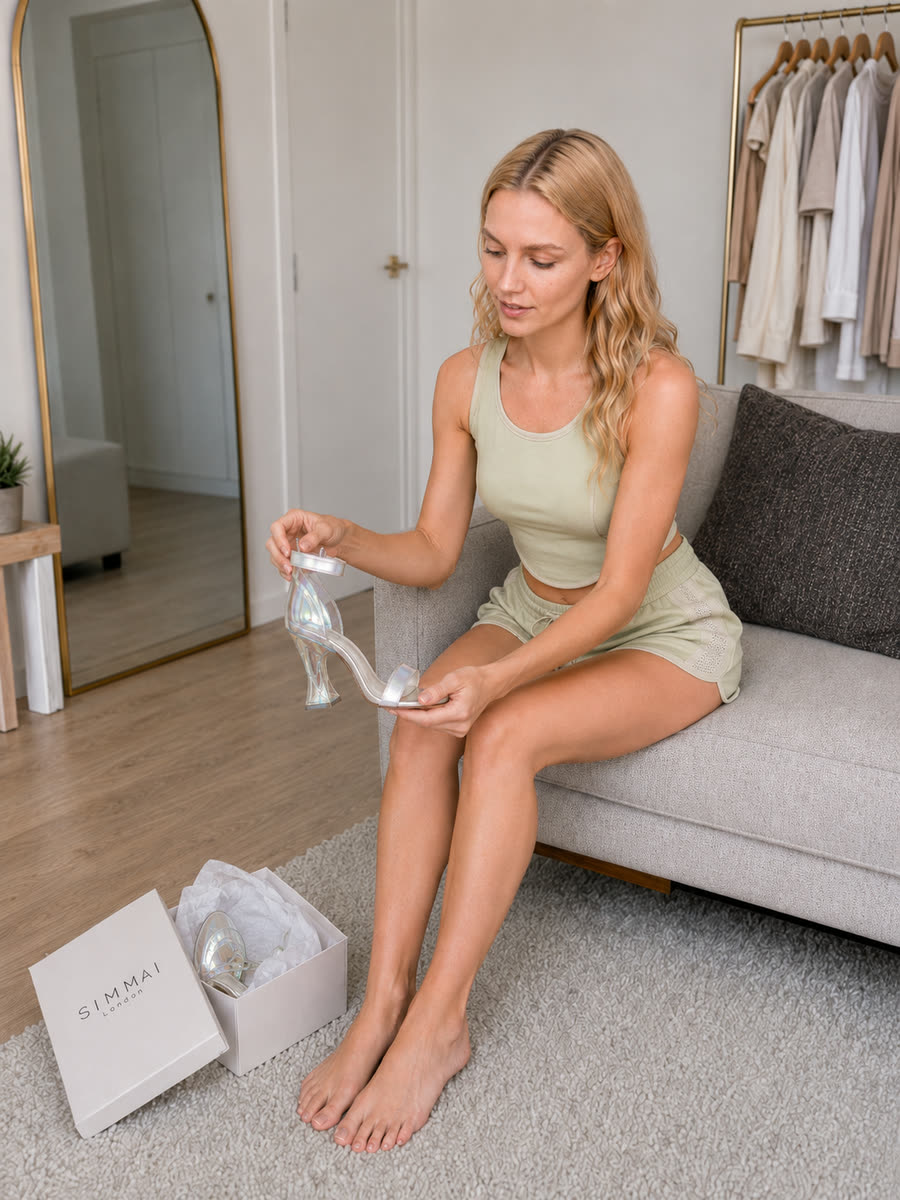
First frame and last frame — same camera position, or the objects slide.
Step 5 — studio and runway
For the studio segment, we dressed Mila in the full look, with and without sunglasses, then added makeup. This is where identity needs extra attention, because makeup changes a face. It can hide the small marks and tiny imperfections that make the character recognizable.
The behind-the-scenes photoshoot shots came together fast and looked convincing: strobe flashes, a studio fan, and a photographer just off-camera. The runway shot is the one that sells the whole film, because it turns the wardrobe, character, and motion into one clear moment.
Nano Banana 2 could not always keep the accessories identical. GPT Image 2 did better for that job: upload the accessory and edit it into the shot. Simple, not magic, which is becoming a theme.
The one shot that has to sell the whole thing. Everything is named explicitly — dress, sunglasses, earrings, bracelet, heels, handbag — because anything you leave unnamed is something the model may quietly redesign.
Reveal the prompt
The same blonde model from the reference walks confidently down a luxury fashion runway with a professional catwalk stride, maintaining the exact same face, hairstyle, white dress, sunglasses, earrings, bracelet, heels, and cream handbag. She reaches the end of the runway, gracefully stops, and performs three elegant high-fashion poses, subtly shifting her weight, rotating her body, lifting her chin, and naturally presenting the handbag. Camera flashes illuminate her as photographers capture every pose. She executes a smooth runway pivot, then confidently walks back. The dress flows naturally, the handbag swings realistically, and every movement is poised and refined. Cinematic fashion film, glossy runway, soft spotlights, shallow depth of field, ultra-realistic, 9:16, 10 seconds, 4K, 24 fps, preserve the exact appearance from the reference, no outfit or face changes.
The studio segment — the full look, then the runway.
Studio stills
The studio stills are the full look assembled from the wardrobe shots, then photographed in a studio setup. This is where the product-shot work starts paying rent.
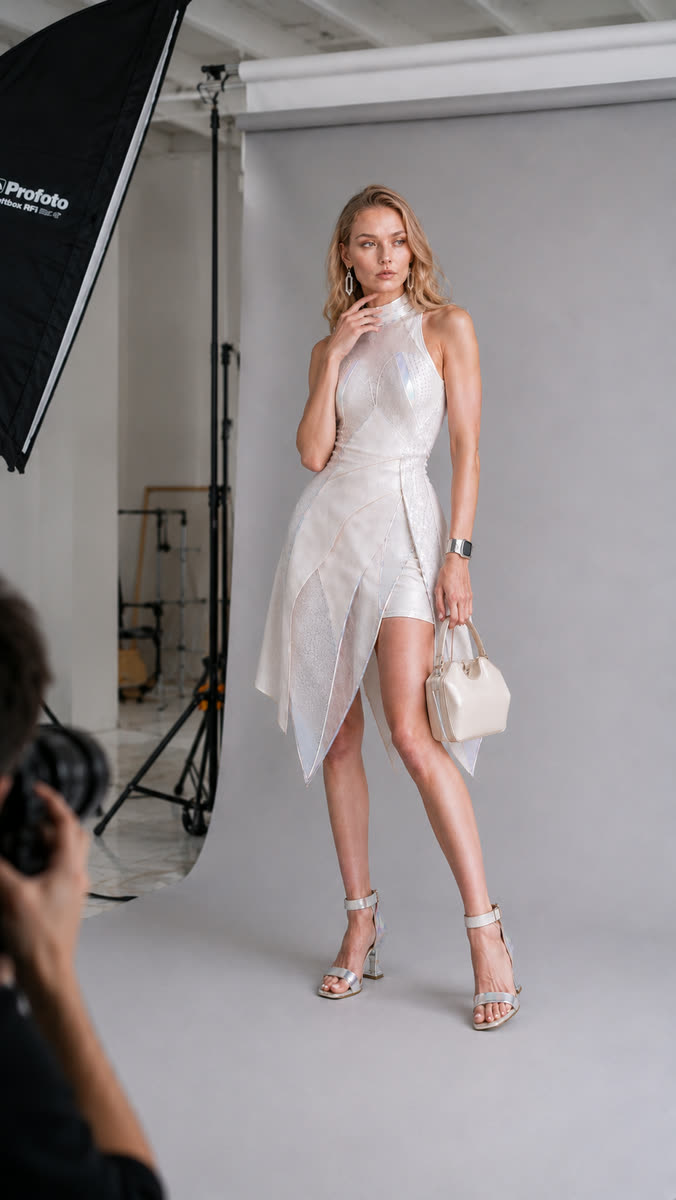
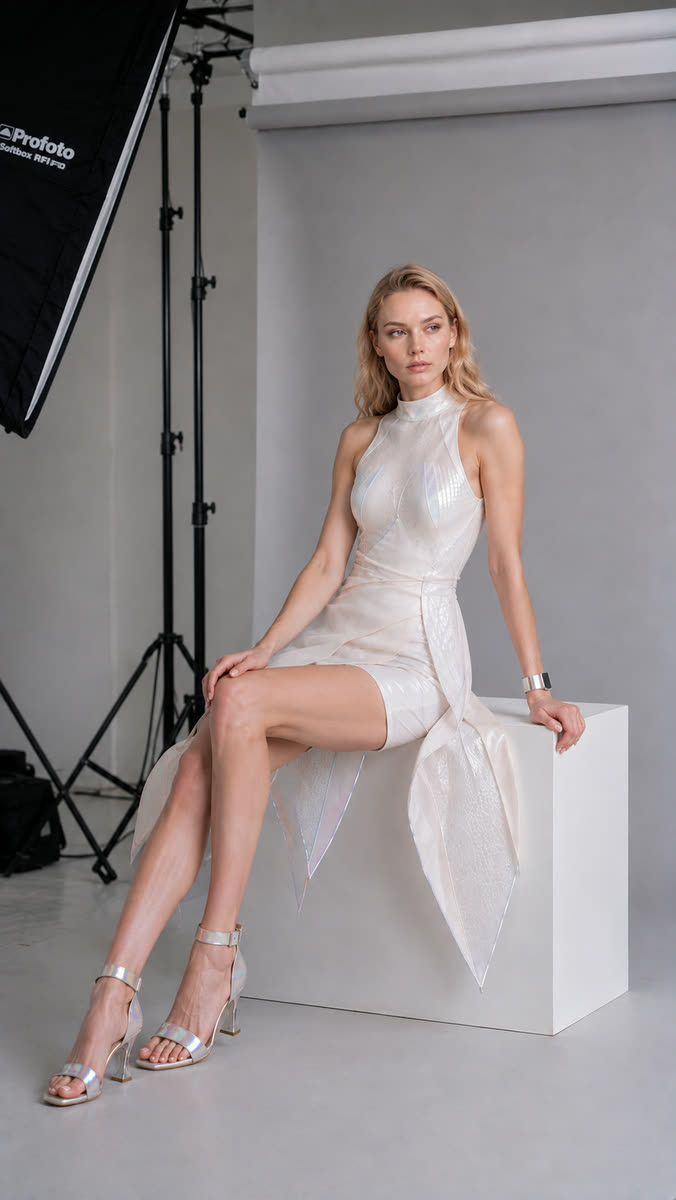
Studio stills — the full look, dressed from the wardrobe shots.
Everything that broke
This is the part many write-ups leave out, probably because it is less glamorous than the final video and more like admitting your suitcase exploded in public. But the failures are not edge cases. They are the job.
Budget for re-rolls the way a photographer budgets for frames. The single most useful discovery was that Seedance often renders in slow motion, and a negative prompt did not fix it, so we sped those clips up 35–40% in the edit.
The handbag passed through her arm
- Why it matters
- Hand-to-object contact is the weakest point in video models today
- What actually fixed it
- Many re-rolls; used only part of the take
Sunglasses temples disappeared mid-turn
- Why it matters
- Small rigid details vanish when the head rotates
- What actually fixed it
- Re-roll while naming that exact detail
The hand rotated a full 360°
- Why it matters
- Anatomy is not enforced unless you notice
- What actually fixed it
- One re-roll
Everything came out in slow motion
- Why it matters
- Seedance stretches a short action to fill the clip
- What actually fixed it
- A negative prompt did NOT help — speed the clip up 35–40% in the edit
The makeup pencil scene
- Why it matters
- Some actions the model simply will not perform, in any phrasing
- What actually fixed it
- Cut it
An unnatural back arch at the end
- Why it matters
- The last frames are where poses tend to break
- What actually fixed it
- Trimmed in the edit
Accessories kept changing between shots
- Why it matters
- Image models drift on small props
- What actually fixed it
- Nano Banana 2 struggled; GPT Image 2 held them — upload the accessory and edit
Try all four engines on your own photo — one studio.
Open the studioWhat it cost
The full production cost $85.45 and took 8 hours 34 minutes for 1 minute 37 seconds of finished video. The bill was $55.45 for image and video generation, $19 for lip sync, and $11 for voice.
So, are AI influencers cheap? Compared with a real shoot with a model, photographer, studio, and location, yes. But not free, and not instant. Also, we are not fashion bloggers; this is a demonstration of what the tools can do today, and more takes plus a better editor would make it better.
| Item | What it covered | Cost |
|---|---|---|
| Seedance 2.0 Pro · Nano Banana 2 · GPT Image 2 | Every image and every video clip | $55.45 |
| Sync.so | Lip sync (only ~20% of the reserve used) | $19.00 |
| ElevenLabs | Voice-over | $11.00 |
| Total | 1 minute 37 seconds of finished video | $85.45 |
| Time | Including editing | 8 h 34 min |
What we would tell you before you start
First: there is no magic button, and there probably never will be. Sorry. The robots have learned lighting and fabric, but they still need a person with taste, patience, and a willingness to re-roll the same shot again without making it personal.
Second: without a clear, interesting script, you will produce expensive noise. A pretty character walking through pretty shots is not a story; it is a screensaver with invoices.
Third: the character is the product, so invest in the reference sheet before anything else. Then budget for re-rolls and for an editor, because the edit is where slow motion, bad endings, and impossible shots get fixed.